Automatic Layout - Flow Layout
Among the unique values CODE Framework brings to WPF development is the ability to apply automatic layouts to UIs, or part of UIs. One such example is the EditForm layout (see also: Automatic Layout and Elasticity). Another, more recent addition, is FlowForm layout. Here’s an example of what a flow form looks like:
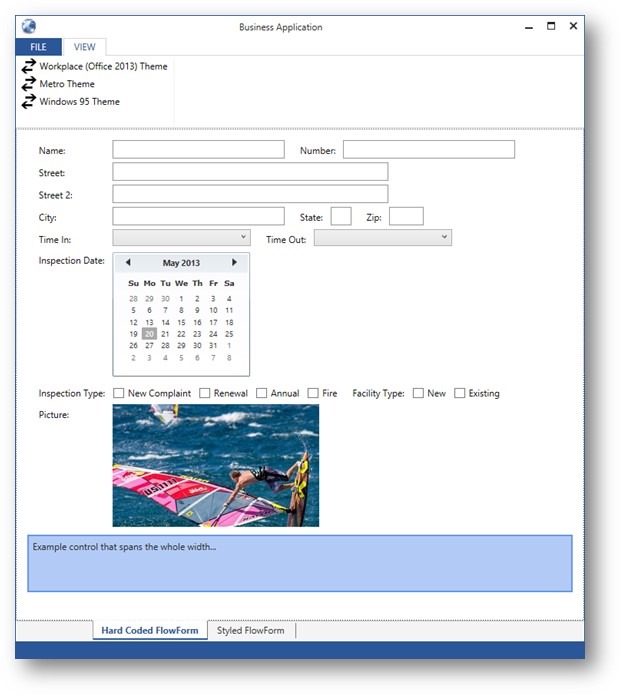
The basic idea behind the flow form is that controls are flowed in left-to-right until a line is full or a manual line break is encountered. The flow form still does some smart things, such as making sure all the first labels in a row have an equal width.
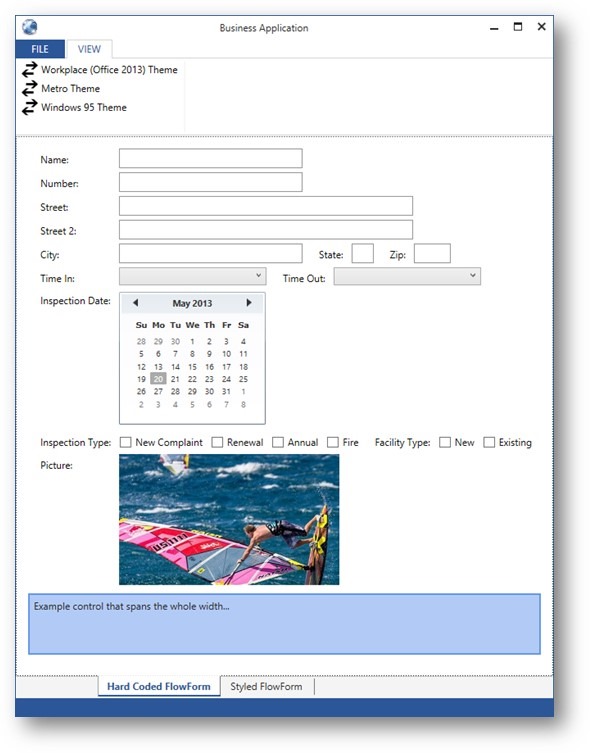
When the form is resized, controls may flow to the next row (note how the Number field is pushed over to the next row, and all the textboxes left edges still line up properly):
Note that the flow form is smart about handling checkboxes and radio buttons, which tend to re-flow a bit different. Note also how in the following example, both Facility Type checkboxes have been pushed to the next line, even though one of them would have still fit:
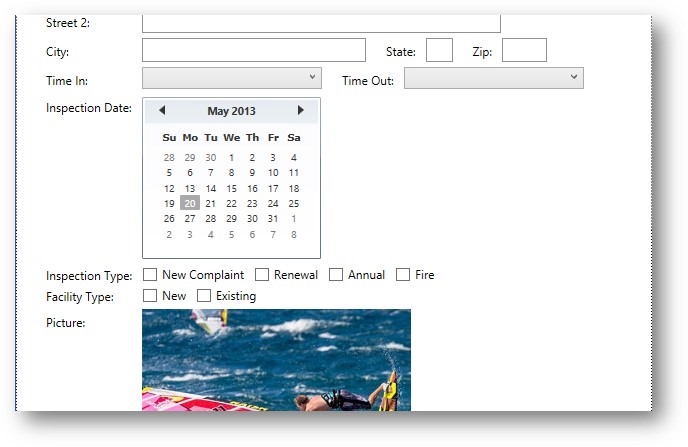
So this creates a much nicer layout with both checkboxes moved to the next line with the matching “Facility Type” label. If only the “Existing” checkbox would have been moved to the next line, things would have been rather awkward, to say the least.
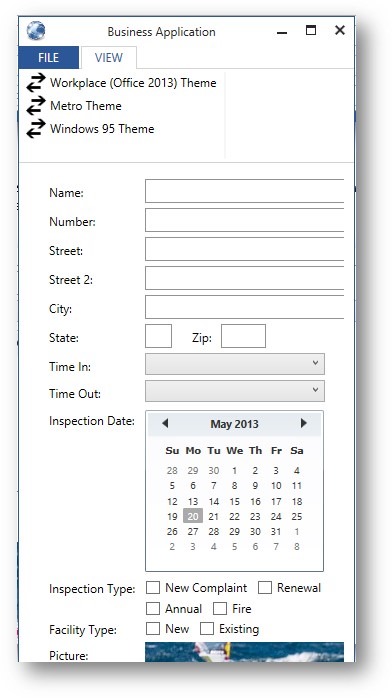
Eventually of course, when the form gets too narrow, the individual checkboxes start to flow like this:
This behavior can be turned on and off with a property, btw.
The flow form also supports some nice new things that will be added to other parts of the framework too. They support the mvvm:View.Label=”xxx” property. When set, it is not necessary to add a <Label> or <TextBlock> element for the label anymore, but you can just set the label property and a label will be rendered automatically. So this is pretty nifty as it further cuts down on the number of things that have to be added to the view and improves maintainability. (I will also add support for this stuff to the EditForm class when I get a chance).
Anyway: Some of this is still work in progress (FlowForm doesn’t yet have category support like the EditForm does, but I will add that in) as I am working in this for our Outlier customer. But I should have a complete version of this in our next public build. It already works pretty good though.
Here’s the code that generated the above example:
<mvvm:View xmlns="http://schemas.microsoft.com/winfx/2006/xaml/presentation"
           xmlns:mvvm="clr-namespace:CODE.Framework.Wpf.Mvvm;assembly=CODE.Framework.Wpf.Mvvm"
           xmlns:layout="clr-namespace:CODE.Framework.Wpf.Layout;assembly=CODE.Framework.Wpf"
           Title="Hard Coded FlowForm">

    <layout:FlowForm EditControlLeftSpacing="10" Margin="10" >
        <TextBox mvvm:View.Label="Name:" mvvm:View.WidthEx="25" mvvm:View.GroupTitle="Facility Information" mvvm:View.GroupBreak="True" />
        <TextBox mvvm:View.Label="Number:" mvvm:View.WidthEx="25" />

        <TextBox mvvm:View.Label="Street:" mvvm:View.WidthEx="40" mvvm:View.LineBreak="True" mvvm:View.GroupTitle="Facility Address" mvvm:View.GroupBreak="True" />
        <TextBox mvvm:View.Label="Street 2:" mvvm:View.WidthEx="40" mvvm:View.LineBreak="True" />
        <TextBox mvvm:View.Label="City:" mvvm:View.WidthEx="25" mvvm:View.LineBreak="True" />
        <TextBox mvvm:View.Label="State:" mvvm:View.WidthEx="3" />
        <TextBox mvvm:View.Label="Zip:" mvvm:View.WidthEx="5" />

        <ComboBox mvvm:View.Label="Time In:" mvvm:View.WidthEx="20" mvvm:View.LineBreak="True" mvvm:View.GroupTitle="Inspection Date and Time" mvvm:View.GroupBreak="True" />
        <ComboBox mvvm:View.Label="Time Out:" mvvm:View.WidthEx="20" />
        <Calendar mvvm:View.Label="Inspection Date:" mvvm:View.LineBreak="True" />

        <CheckBox mvvm:View.Label="Inspection Type:" mvvm:View.LineBreak="True" Content="New Complaint" />
        <CheckBox Content="Renewal" />
        <CheckBox Content="Annual" />
        <CheckBox Content="Fire" />
        <CheckBox mvvm:View.Label="Facility Type:" Content="New" />
        <CheckBox Content="Existing" />

        <Image Source="https://fbcdn-sphotos-f-a.akamaihd.net/hphotos-ak-ash3/s480x480/164940_379711192146374_1851995878_n.jpg" Stretch="UniformToFill"
               mvvm:View.WidthEx="30" mvvm:View.HeightEx="10" mvvm:View.Label="Picture:" mvvm:View.LineBreak="True" />

        <Border mvvm:View.SpanFullWidth="True" mvvm:View.LineBreak="True"  Height="75" BorderBrush="CornflowerBlue" Background="#7E6495ED" BorderThickness="2" Margin="5">
            <Label>Example control that spans the whole width...</Label>
        </Border>
    </layout:FlowForm>

</mvvm:View>